Monday, March 28, 2011

Brownies!


If I could only have one form of dessert for the rest of my life, the brownie would be a serious contender for the top spot. Yes, pies are delightful, cookies are comforting, and cake is festive. But when it comes right down to an immensely satisfying form of chocolate baked goodness, there is nothing really close.

Most of my formative batter licking experiences happened while making brownies. Truth be told there was more than one occasion, when baking with a childhood friend, the brownies never actually got baked. 

I like most any brownie. The boxed mix variety with those squeezey chocolate packets were my brownie of choice for a long time. I loved very gently picking up the chunks of dry mix (they crumbled very easily, remember?) and eating them. The only brownie that has no place for me is the cakey brownie. I mean seriously, a cakey brownie? If you want a cakey brownie, make CAKE for cripes sake. And don't get me started on nuts in brownies. I'll take a nut in my chocolate chip cookie sooner than in my brownie. If you are looking for a nut-brownie recipe it is not here.

But better than a squeezey chocolate packet brownie mix brownie is the homemade from scratch (or as my brother-in-law calls it, from itch) brownie. There is no shortage of great recipes here. The Moosewood cookbook has a good one and you feel somewhat righteous making it because of the source. I just Googled "brownies from scratch" and got 183,000,000 results in .12 seconds. I've made a handful of different brownie recipes, the more recent ones I've tried are recipes that call for cocoa powder vs. melted chocolate.  I like the cocoa powder recipes better, at some point maybe I'll try side by side taste test. At any rate, I tend to go for the cocoa powder recipes, since those ingredients tend to be in my pantry. If I have a chunk of chocolate suitable for melting, it usually gets hacked up and eaten bit by bit. This is not a problem with cocoa powder.

The brownies I made yesterday came from Fine Cooking. I've jazzed them up in the past with things like instant espresso powder, ganache topping and the like. On their own, these brownies deliver that great dense chocolaty punch that you can't get anywhere but in a brownie.

Watch your time carefully on these, they are meant to be dense and not overcooked.

Fudgy Brownies (from Fine Cooking magazine)
Ingredients
12 oz. (1 1/2 cups) unsalted butter, cut into 9 pieces; more softened for the pan
3-3/4 oz. (1-1/4 cups) unsweetened natural cocoa powder, sifted if lumpy
2-3/4 cups granulated sugar
1/2 tsp. table salt
5 large eggs
2 tsp. pure vanilla extract
7-1/2 oz. (1-2/3 cups) all-purpose flour 

What to Do
Position a rack in the center of the oven and heat the oven to 325°F. Line the bottom & sides of a 9x13-inch straight-sided metal baking pan with heavy-duty aluminum foil, leaving about a 2-inch overhang on the short sides. Lightly butter the foil.

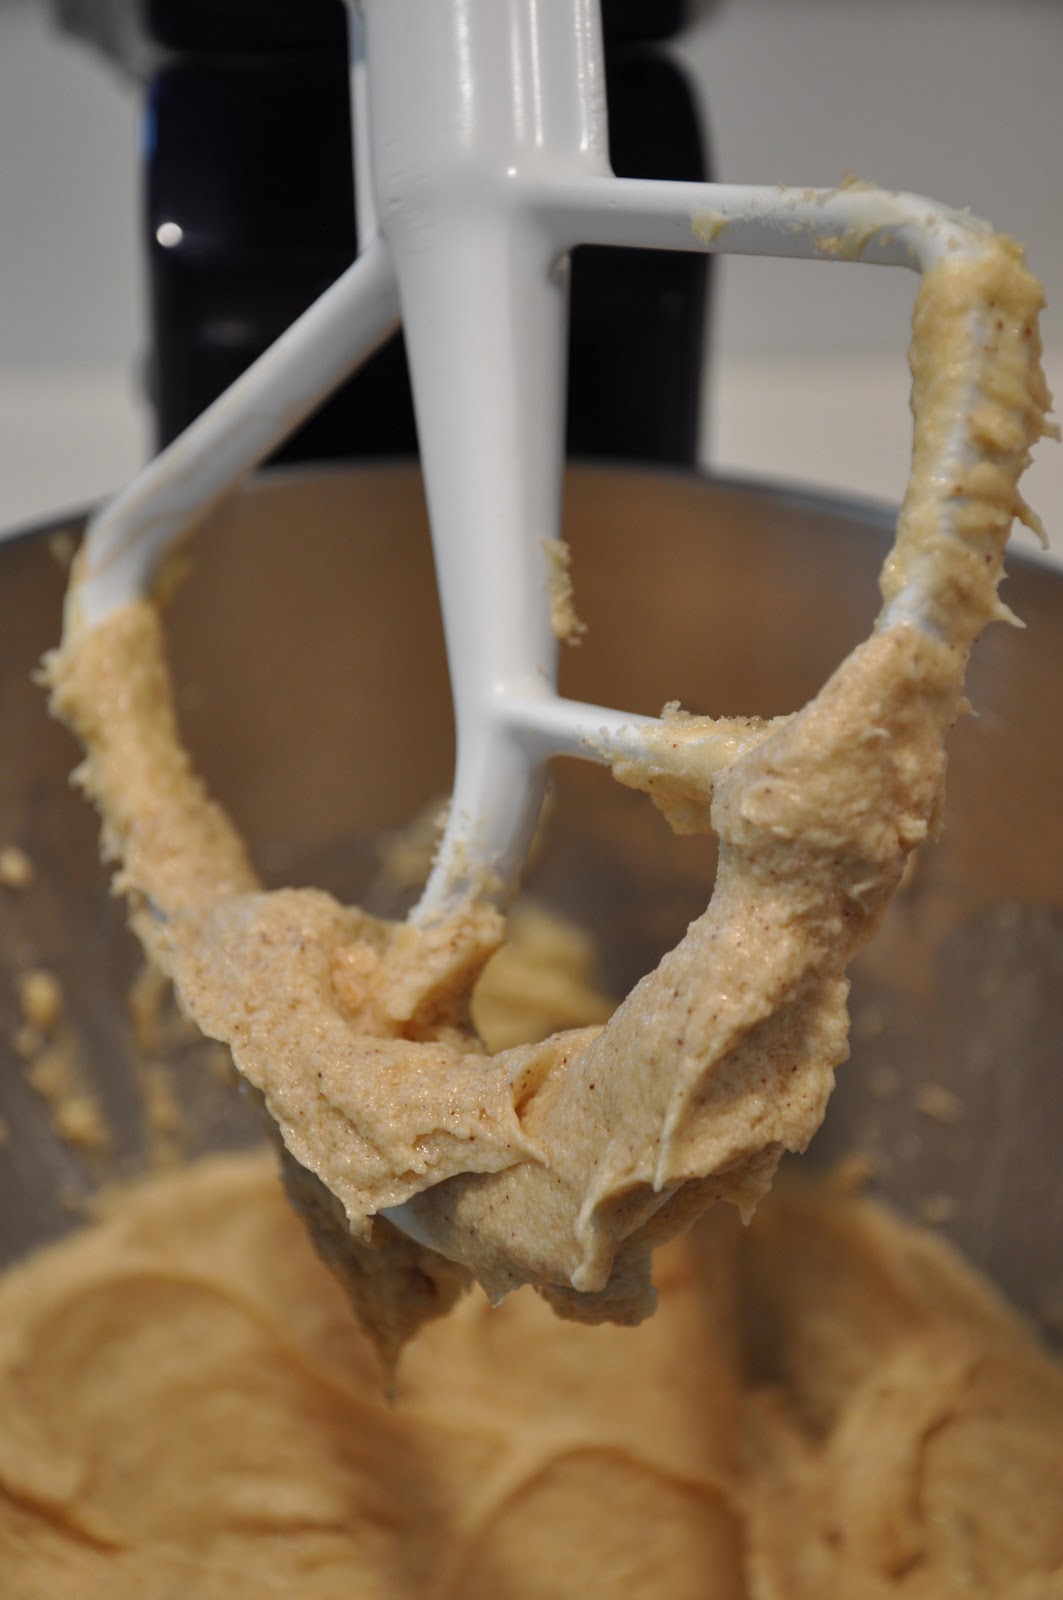
Put the butter in a large (4-quart) saucepan over medium-low heat and stir occasionally until melted, about 2 minutes. Off the heat, whisk in the cocoa powder until smooth, 1 minute. Add the sugar and salt, and whisk until well blended. Use your fingertip to check the temperature of the batter—it should be warm, not hot. If it’s hot, set the pan aside for a minute or two before continuing.

Whisk in the eggs, two and then three at a time, until just blended. Whisk in the vanilla until the batter is well blended. Sprinkle the flour over the batter and stir with a rubber spatula until just blended.

Scrape the batter into the prepared pan and spread evenly. Bake until a toothpick inserted in the center comes out with small bits of brownie sticking to it, 35 to 45 minutes. Cool the brownies completely in the pan on a rack, about 3 hours.

When the brownies are cool, use the foil overhang to lift them from the pan. Invert onto a cutting board and carefully peel away the foil. Flip again and cut into 24 squares. Serve immediately or wrap in plastic and store at room temperature for up to 3 days. They can also be frozen in an airtight container or freezer bag for up to 1 month.

Wednesday, March 23, 2011

Chocolate Chip Cookies (dare I say perfect?)

After my mediocre CCC experiment the other day (let's be honest, those cookies kind of sucked), I went back to the  Chocolate Chip Cookie recipe from the New York Times article that I referenced in a recent post. These cookies did not disappoint. They came out thick, with crispy outside and chewy-gooey chocolate-y insides.


I think the key to this cookie's goodness is the aging process. The article explains the chemistry at work here, but there are also flavor development processes going on. Think of your stews, soups and meatloaves. Almost universally, these are better the second or third day than they are when first cooked. Same with these cookies. The rest time lets the flavors meld and deepen - the article describes the 36 hour cookie, in comparison with cookies from younger dough like this: "they had an even richer, more sophisticated taste, with stronger toffee hints and a definite brown sugar presence."

I mixed up the dough for these cookies Sunday afternoon and baked them Tuesday night. They were over the 36 hours, as I baked them at around the 50 hour mark. While the dough aged temptingly in the fridge, we started calling it "the entity" as it was a sizeable mound and beckoned with a siren's call.

Then, after all that, I messed up in the baking. But, like many mistakes, I think I ended up with a happy accident. These cookies are supposed to bake at 350. I wasn't looking when I set the oven and it wasn't until after I took them out that I realized the oven was at 450. The outside got pretty golden brown, but the insides were still gooey. Since this is my preference, I'd gladly make this mistake again.

By a small miracle of exceptional will-power, all of  these cookies (minus the 2 - 1/2 that Tom & I had to sample) got bundled up and delivered to my brother this morning for his birthday. A very happy and delicious ending to a Chocolate Chip Cookie quest that included 2 different doughs, about 4 bags of chips and lots of happy sampling.


Chocolate Chip Cookies
(From the New York Times article, "Perfection? Hint: It's Warm and has a Secret" and recipe adapted from Jacques Torres)
Notes about my adaptations follow the recipe

Ingredients
2 cups minus 2 tablespoons (this is 8-1/2 ounces) cake flour
1 -2/3 cups (this is 8 1/2 ounces) bread flour
1-1/4 teaspoons baking soda
1-1/2 teaspoons baking powder
1-1/2 teaspoons coarse salt
2-1/2 sticks (1 1/4 cups) unsalted butter
1-1/4 cups (10 ounces) light brown sugar
1 cup plus 2 tablespoons (8 ounces) granulated sugar
2 large eggs
2 teaspoons natural vanilla extract
1 1/4 pounds bittersweet chocolate disks or fèves, at least 60 percent cacao content (see note)
Sea salt.

What to Do

1. Sift flours, baking soda, baking powder and salt into a bowl. Set aside.
2. Using a mixer fitted with paddle attachment, cream butter and sugars together until very light, about 5 minutes. Add eggs, one at a time, mixing well after each addition. Stir in the vanilla. Reduce speed to low, add dry ingredients and mix until just combined, 5 to 10 seconds. Drop chocolate pieces in and incorporate them without breaking them. Press plastic wrap against dough and refrigerate for 24 to 36 hours. Dough may be used in batches, and can be refrigerated for up to 72 hours.
3. When ready to bake, preheat oven to 350 degrees. Line a baking sheet with parchment paper or a nonstick baking mat. Set aside.
4. Scoop 6 3 1/2-ounce mounds of dough (the size of generous golf balls) onto baking sheet, making sure to turn horizontally any chocolate pieces that are poking up; it will make for a more attractive cookie. Sprinkle lightly with sea salt and bake until golden brown but still soft, 18 to 20 minutes. Transfer sheet to a wire rack for 10 minutes, then slip cookies onto another rack to cool a bit more. Repeat with remaining dough, or reserve dough, refrigerated, for baking remaining batches the next day. Eat warm, with a big napkin.
Yield: 1 1/2 dozen 5-inch cookies.

Notes about My Adaptations

Flour - I didn't use cake flour. I used all purpose flour and bread flour. I think you will get slightly different results using only AP flour, but I wouldn't worry too much about it. I did weigh my flours, as I think you get a more accurate quantity that way.

Chocolate - I didn't use the disks. I had 2 types of semisweet chocolate chips (Ghiradelli & Guittard), but I did use 1-1/4 lbs of chips. Holy crap.

Size - I baked a standard size cookie, not the jumbo version described here. Should I even bother trying to be moderate when using 1-1/4 lbs of chocolate and lots of butter?

Bake Temp & Time: I accidentally baked at 450 instead of 350. At that higher temp, the (smaller) cookies took about 11 min. I'd guess that at 350, they'd be more like 12-14 min. 

Sunday, March 20, 2011

Chocolate Chip Cookie update

 Following up from my earlier post with results from the baked product. In a word, 'meh.' These cookies were ok, certainly better than many I've had, but not even close to the best I've made. They were a bit flat tasting, and lacked that inherent chocolate chip cookie goodness.

Here's my diagnosis:
Corn Syrup - Helped achieve some of the thickness that I wanted, but detracted from the flavor in it's flatness. left the cookie with bit of a gummy-ness rather than the chewiness I was looking for.
Shortening - Again, helped with the thickness, but left the flavor  flat. The cookies did not have that richness you get from butter. Not a surprise.
Sugar & Salt on top - Got mixed reviews. I liked the salt, but my fellow samplers could have done without it. The sugar wasn't a highlight or a lowlight.


I think the key is to use my fat (butter) and flour / sugar proportions to get the thickness and gooey-ness that I'm looking for. A good reminder that the more real and closer to the source the ingredient is (e.g. butter vs. shortening, sugar vs. syrup) the better the outcome!

I'm going back to my standard recipe for my next try and will follow up soon with those results.

Chocolate Chip Cookies, Chapter 2


Coming back to Chocolate Chip Cookies, as promised and because, well - it's always good to come back to CCC. And because my brother's birthday is coming up and he's the kind of brother that you just want to make chocolate chip cookies for. When I was in college, he'd bake and mail cookies to me. Slightly crushed and more than slightly delicious they would arrive, to the oohs and ahhs of my roommates.

For these cookies, I'm falling back on a little cookie chemistry, and a bit of experimentation. My quest is that fat, crispy outside, gooey inside cookie that a I posted about a few weeks ago. A couple years ago, the New York Times had an article on Chocolate Chip Cookies (all the news that's fit to eat?). You can read it here. It's a bit history and a bit chemistry. The chemistry part is this - you get a better cookie if the dough rests for about 36 hours before you bake the cookie. I know, this is tough. Usually you make chocolate chip cookies because you really need to eat one Right Now. So bake a couple of them, and then let the remaining dough rest.

Why does this make a better cookie? The New York Times article describes it well. In a nutshell, the rest time lets the dough soak up the liquids (eggs), this makes for a firmer and drier dough and better cookie consistency.

For these cookies that are in process (aka aging in my freezer) I had an dough brainstorm that I'm experimenting with. While eating a Lumberjack (sadly the last of that frozen dough) the other night, I got thinking about the crispy outside, chewy inside perfection of this cookie and realized, 'hey, this is what I want for my chocolate chip cookies!' From that, I decided to follow the general Lumberjack ingredients and ratios, but apply those to a chocolate chip cookie recipe.

I substituted corn syrup for the molasses, and used all shortening and no butter. I want to establish some type of baseline that I can then adapt from with future batches. Ideally, I'll get to a point with more butter and less shortening, but I didn't want to try too many different things first time out.

The basic recipe I created is below. I haven't baked these yet, but will probably try a couple later today (this will only be at the 24 hour point of aging) and will report back on hopefully delicious results.

Chocolate Chip Cookies
Ingredients
1/2 c light brown sugar, packed.
1/2 c butter flavored Crisco (aka "fat sticks")
1/2 c light corn syrup
1 tsp instant espresso powder
1 egg
1 tsp vanilla
2 c flour
1/2 tsp baking soda
1/2 tsp salt
12 oz good quality dark chocolate chips (I like Ghiradelli or Whole Foods 365 brand)
Optional
Turbinado or other coarse sugar for topping.
Kosher or other large flake salt for topping.

What to do
Cream together sugar and shortening in a stand mixer (or with hand mixer). Add the corn syrup and continue mixing, then add the espresso powder. Add the egg and vanilla and mix until all is well blended. A quick note about the espresso powder. First, I love instant espresso powder and look for every opportunity to use it. Second, I think corn syrup is sort of uninspired and flat tasting, so I wanted to pep up the dough a bit. This amount of powder gave the dough a nice added depth, but not a strong coffee flavor.


You can just see the espresso flecks in the dough
In a medium bowl, mix the flour, soda, and salt together. Slowly add to the wet ingredients. Dough will be on the dry side. Add chocolate chips and mix with a wooden spoon until all blended in. 

Wrap dough up well in plastic and age in refrigerator or freezer up to 36 hours.

Having not baked these yet, these instructions are not yet tested. When you are ready to bake, preheat oven to 350 (convection bake if you have that option). Scoop dough out into roughly walnut sized balls, and dip in the Turbindo sugar and then sprinkle with some sea salt (again the toppings are optional). Bake for 9-11 minutes (I think). Remove from oven and cool on racks.

I'll report back once I bake these and note any changes.
 

Saturday, March 12, 2011

Spent Grain Bread


Tom has embarked on his third batch of homebrew, a yet to be named IPA. Since he started making beer in September 2010 I've been wondering about using the spent grains for bread making. Since we are essentially making the liquid and baked version of the same thing (yeast, grain, water, sugar fermentation) it seemed like I should be able to make a bread out of what he leaves behind.

His current brew used crystal malt and toasted barley, and there were heaps left over. I did some research and found many other like-minded brewer/bakers. The recipe I ultimately adapted was from a site called Top Fermented. I made some adjustments here and there, with my final product being a large and lovely loaf.

Spent Grain Bread
Ingredients:
1 cup whole wheat flour
2-1/2 cups bread flour
1/2 cup spent grains
1/2 tsp kosher salt (after the tasting the bread, I'd go to at least a teaspoon next time)
1 Tbs yeast
1-1/4 (and a bit more) warm water
1 Tbs molasses

What to do:
Mix grains, flour, salt & yeast in the bowl of a stand mixer, fitted with the dough hook. Mix the molasses into the warm water and then add to the dry ingredients. Mix on low to medium low until dough comes together in a clump, pulling away from the edges of the bowl.

Put dough into oiled or buttered bowl to rise. As usual, mine went into the microwave which gets nice and toasty when the light underneath is on (my micro is mounted over my stove, so there is a light on the micro that illuminates the stove top).

Before the rise. You can see the grains in this dough.
 Total rise time was about 3 hours, though the bread was probably ready after 2. However, I was hungry and wanted to get to the store for some dinner items and lunch, so my dough waited patiently at home, along with the dog.

Top Fermented suggested to bake on a pizza stone (you can substitute a cookie sheet sprinkled with cornmeal) and putting a broiling pan on the next lower rack. When you add water to the preheated broiling pan the steam helps to create a good crust on the bread. I preheated my oven, pizza stone and broiling pan to 425 while I formed and shaped my dough, as described next.

Remove the risen dough from the bowl and, adding minimal flour, work the dough into the shape you want. I shaped mine into an oblong loaf. I put it back in the microwave for the final rise, about 30 minutes. The oven and stone preheated during this whole second rise.

The dough poofed up quite well in this second rise. Not a big surprise - the yeast to flour ratio in this recipe is pretty high. I made some slashes in the top of the loaf and slid it - on parchment - on to my hot pizza stone. I probably would have gotten a better bottom crust cooking directly on the stone, but it was easier to transfer the dough while it was on parchment. Next time I'd make 2 smaller loaves and skip the parchment. Once I put the bread in the oven, I poured about 1-1/2 cups of water into the broiler pan below the stone.

I baked the bread for 35 minutes and for once resisted temptation to sample it too soon. It helped that there was a Belgian Beer tasting that we wanted to go to, so I was physically removed from the good smelling, hot loaf.

 Back home after the tasting - some good beers and one that had a bit too much cheese-funk taste for my liking - we cut into the loaf.

It was perfectly cooked, with a pretty tight crumb. The chew of the crust is a nice contrast with the soft bread. It smelled kind of beery (no surprise). I liked the taste of it, though I'd increase the salt to a full teaspoon next time.  The salt level of this loaf  does lend itself to both sweet and savory toppings. I had to sample a piece with butter, then with some honey.

I realize not everyone has spent grains hanging around their kitchen. I think you could try using leftover cooked grains - farro, oatmeal, quinoa. Alternatively you could leave them out all together, or throw some uncooked oatmeal in the mix.

I think this would be a good recipe if you are interested in trying bread baking, but leery of the time commitment and have a fear of bread impotence (i.e problems with the rise). As I mentioned, the yeast / flour ratio is high, which provides a Viagra like effect. My total  hands-on time with this bread was about 10 minutes.

Unfortunately, I won't be able to have this bread with it's beer cousin unless I freeze some. I think the IPA is due to be ready in about 6 weeks. You can read all about that process at Tom's new blog Pitch the Yeast.

Thursday, March 10, 2011

Peter Reinhart on bread

Do you know about TED?  TED (Technology, Entertainment, Design) is a non-profit devoted to ideas worth spreading. It's kind of hard to explain TED - they host a couple conferences each year where the speakers, "the world's most fascinating thinkers and doers," are challenged to offer inspiring, thought provoking talks, in 18 minutes or less.

The short videos found at the TED website inform me and inspire me. I found this one recently Peter Reinhart on Bread. Reinhart is master bread-maker, teacher & theologian. who talks about the process of bread becoming bread. This talk reminded me that bread is more than just yeast, flour and water - it's a process of transformation.

I hope you like it, if it doesn't inspire you to bake bread perhaps you'll be a just a bit happier the next time you eat some.

Sunday, March 6, 2011

Bark! (woof)


I've been thinking about chocolate bark for most of the week. Not sure what prompted it, other than we were out of the really good dark chocolate that we often have a wee piece of for dessert. While not much beats an unadulterated piece of really good dark chocolate, sometimes I like stuff in or on my chocolate to mix things up a little.

While I was coming up with ideas for my mix-ins, I pulled out The Flavor Bible, by Karen Page & Andrew Dornenburg. This is a great cooking resource - a bit hard to describe, so I'll let Amazon.com do it:

"An alphabetical index of flavors and ingredients, the book allows readers to search complimentary combinations for a particular ingredient (over 70 flavors go well with chickpeas; over 100 are listed for oranges), emphasizing the classics (chives with eggs, nutmeg with cream, sardines and olive oil, etc.)...The listings, combinations and short essays from various chefs on different matches are meant to inspire rather than dictate-there are, in fact, no recipes included. Instead, the volume is meant as a jumping-off point for those comfortable in the kitchen and eager to explore..." 

We use this book a lot, since our favorite way of creating meals involves foraging at our local shops, farmer's markets, bakeries and fish markets for what is fresh. The book helps us tie things together, usually with some staples and basics that are already in our pantry. I appreciate some of the more off the beaten track combinations that this book offers.

But back to the Bark. I wound my way through The Flavor Bible, not necessarily using the chocolate section, but using an ingredient that I knew I wanted to put in my chocolate, for instance orange zest, and then seeing what some of the suggestions were. I made a long list of some Barks that I wanted to make, then Tom & I each picked one. 

I ended up making a dark chocolate bark with orange, candied ginger and white chocolate drizzle - this was my pick. Tom picked dark chocolate with cocoa nibs, coffee beans, espresso powder and topped with alder-smoked sea salt. I call this one "Bark with a Bite."

The basic recipe couldn't be easier, and it is oh-so adaptable.

 Orange Ginger Chocolate Bark

Ingredients
6 oz good quality dark chocolate (at least 65% dark, 70-72% is preferred)
2 oz white chocolate
2 tbs orange zest
2 or 3 tbs chopped candied ginger
  
 What to do
Zest the orange and set aside. Chop the ginger into small pieces. I used pieces that were maybe the size of a lentil (how's that for an obscure size reference?). You want the ginger to be big enough to see and taste, but not so big that it overpowers your bite of chocolate. Candied ginger is really sticky. I separated the chopped bits and put them on a cookie sheet and stuck it in the freezer so I could more easily sprinkle them over the chocolate when I was ready. 

Chop the chocolate - I found that using a big sturdy knife, putting the point straight up and down right on the chocolate then using one of my heavy pans as a hammer cracked nice size shards off the chocolate and was a lot easier than trying to chop this brick of chocolate that I bought. 

Melt the dark chocolate. I'm a fan of melting chocolate in the microwave, and setting it for a minute on about 60% power melted it slow enough and allowed me to check progress frequently. I think it took 2-3 minutes ultimately. Stir the orange zest into the chocolate, make sure to taste (yay!) to see if the orangey-ness is to your liking. Melt the white chocolate the same way.

Spread the dark chocolate on a cookie sheet covered with wax paper or a silicone baking sheet. I spread it out to just smaller than a sheet of paper. Use a spoon to drizzle the white chocolate (a la Jackson Pollack) over the dark chocolate. Sprinkle the ginger over the top of the chocolate. Put in fridge for 15-30 minutes to firm up, then snap random pieces off. I've seen recipes that suggest storing wrapped up in the fridge and others that don't suggest that. Mine is just in a tupperware in the pantry, though not for long I suspect.

Bark with a Bite - Coffee, Cocoa Nib Bark with Smoked Sea Salt
(It just occurred to me that if I put bits of bacon on top of this, it would count as breakfast)

Ingredients
6 oz dark chocolate (just like above) 
2 - 3 tbs of cocoa nibs
3 tbs coffee beans, pulsed in 1 second increments, 2 or 3 times in a coffee grinder.
2 tsp instant espresso powder.
Smoked sea salt (any sea salt would do just fine, or no salt if you prefer. I like the way that salt intensifies the taste of chocolate, so I'm votin' for salt).

What to do
Melt the chocolate according to the instructions above. When the chocolate is melted, mix in the espresso powder until it dissolves. Mix in the nibs and coffee, reserving a little to add after you spread the chocolate out (if you want to, that is).

Spread the chocolate out on baking sheet prepared as above, again to just slightly smaller than a sheet of paper. I let the chocolate cool slightly before I put the salt on, thinking that the salt might either sink in and disappear, or it would melt in the warm chocolate. Chill in fridge 15-30 min., then snap and store. Oh yeah, and sample as you go!

Saturday, March 5, 2011

I'm a Lumberjack and I'm ok


Despite my professed love for the chocolate chip cookie, today's soft but crispy, sugar topped molasses cookie is right up there among my favorites. Don't get me started on how good this dough is in its uncooked state.

This cookie - the Lumberjack - came from an Old Sturbridge Village cookie recipe book that one of my sisters has had for probably close to 30 years. I've tweaked the original recipe a bit, updating the sugar topping (I use Tubinado for the top for bigger sugar crunches) and fiddled with other ingredients from time to time.

Ultimately this is just an easy, dependable, and most importantly, delicious recipe. Most ingredients are always in the pantry and the dough freezes exceptionally well.


Lumberjack Cookies
Adapted from an Old Sturbridge Village recipe book (and from Mary's recipe card)

Ingredients
1 cup white sugar
1 cup shortening (I use Crisco butter flavored. I know, not the purest of ingredients, but it works well)
1 cup dark molassess
2 eggs
4 cups flour, sifted (or not, if you don't feel like it)
1 tsp baking soda
1 tsp salt
2 tsp cinnamon
1 tsp ground ginger

What to do
Cream together the sugar and shortening in stand mixer on medium high until light & fluffy. Reduce to lower speed and add molasses, then add eggs one at a time. Mix until well combined.

Sift or mix together dry ingredients, then slowly add to wet ingredients while mixer is on low. Mix until combined. Resist eating too much dough at this stage.

At this point, I like to refrigerate the dough for a while, it will make it easier to roll into little balls. I think you get a better cookie starting with colder dough. Putting this dough in the freezer for awhile speeds up your process.

 When you freeze this dough, due to the shortening, it doesn't get rock solid. It is roll-able right out of the freezer. I'll get the oven preheating while I roll out the cookies and pop them in while still chilled. I think starting with frozen dough yields the best results for this cookie. Cooking time may need to be a bit longer when using frozen dough.

When you are ready to roll out the cookies, preheat the oven to 350 degrees. Roll dough into walnut-sized balls, then roll the balls in sugar. You can use plain white sugar, but I like a bigger grain sugar. I think the bigger grain sugar adds a better crunch and since these tend to be a darker sugar, adds a little toasty caramel taste to the cookie.

Bake on ungreased cookie sheet for 12-15 minutes. When done, the cookie will have some cracks in the top, but will still be a bit soft when tested. I like to bake these cookies using the convection bake option on my oven. I think it helps create a crisper crust with a soft inside. If I use convection, I'll reduce the cooking time a bit - maybe to 9 - 11 minutes.

Walnut sized cookies will yield about 4 dozen. I've used a small sized ice-cream scoop (about a 2 tsp volume) and got closer to 5-6 dozen.

Some successful modifications I've tried (I've tried these independently, not all in the same batch):
- Add a heavy teaspoon of vanilla extract
- Use a combination of honey and molasses (I think I used about 2/3 molasses and 1/3 honey)
- Add some instant espresso powder. Start small and taste frequently as you go. Be aware that the flavor will strengthen as the cookie bakes.

Some other ideas that I haven't tried:
- Toss in some raisins or other dried fruit, maybe some lemon or orange zest
- Add some nuts
- Use a combination of brown and white sugar.